Curtains are an important element of home decor, serving both aesthetic and functional purposes. Every home or office is equipped with some kind of curtain for light control. Every curtain is designed in a different way and needs a specific installation method. For your convenience, we have already prepared a beginner’s guide to hanging curtains.
Why Proper Curtain Hanging Matters
Proper curtain installation is necessary to achieve a designer look. Hanging the curtain so it aligns with the wall and ceiling creates an optical illusion. While other factors also matter when placing the window curtains. Hanging curtains closer to the ceiling gives the illusion of height. When you extend the curtains 6 inches on each side, it gives the window a wider look. Properly hung curtains eliminate the gaps and control the light in the room. Moreover, curtains also block excess heat and cold from entering the room. Similarly, layered curtains give privacy during the day and a darkout look at night.
Selecting For Curtain Hardware

Opting for the best hardware can free you from long-term replacement and repair stress. When we talk about hardware, it’s not just rods, wall anchors, and studs.
Curtain Rod
As per the weight of the curtains, you can opt for a single, double, or tension rod. Further, magnetic rods are more common in renters’ homes. Whether you are choosing modern or luxury curtains in Dubai, the rod type you select depends on your style, window size, and curtain weight.
Brackets
To hold the tracks in place, choose from ceiling-mounted or wall-mounted hardware. For heavy-duty curtain rods, you need to pick the center support bracket.
Screws & Anchors
To fix the brackets to the wall, you must choose the right anchors or screws. Readily available ones are plastic and metal. You can choose based on the durability you want.
Curtain Rings
To slide the curtains across the pole, these circular elements are used. Hooks are available in plastic and metal. For heavier drapery, metal is the best option.
Glider
Within a window curtain track, these smaller objects move along it.
Finials
These decorative finials are placed at the end of curtain rods to prevent fabric from falling.
Holdbacks
These are U-shaped objects that hold the curtains without any ties. They are available in wood and metal.
Tie-backs
These are designed to hold the drapery. You will find them in bands, cords, and ropes.
Tool And Materials
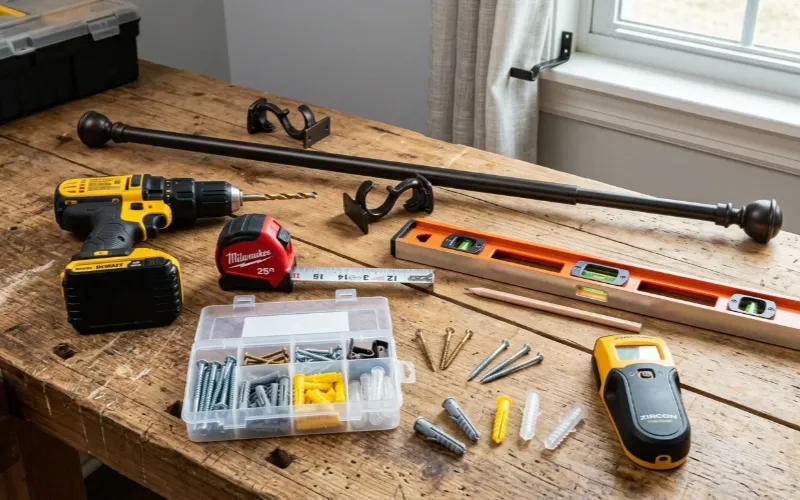
To install the window curtains like blackout and sheer curtains properly in your home, you need a toolkit. Additionally, the following materials are required for accurate curtain placement.
- Curtain Rods
- Tape
- Drill
- Screws
- Level Tool
- Pencil
- Anchor
- Stud Finder
Step 1: Measure Your Window Correctly

You might be worried about how to measure windows for curtains. To achieve a high-end look, you must measure your windows accurately. To ensure your window drapes hang perfectly, follow the tips below.
Width
For a full coverage look, you need to cover the curtains over the window frame. Remember not to block the light completely. Try to add at least 8 to 12 inches extra on each side of the window. This tip allows your room to gain more natural light.
Height
Before you begin, find out where to place the curtain rod. To get a modern look, place the rod 4 to 6 inches from the ceiling. Now, start measuring from that point to the end of the frame. Right before you start measuring the length of the curtains, you need to determine the desired length.
Sill Length
This length generally ends up right above the window sill. This is the ideal length for smaller windows and a kitchen.
Apron Length
This type of length actually extends below 4 inches to the window. You can achieve a tidy, tailored look with this length.
Floor Length
One of the most popular is floor length. It ends up ½ inches above the floor.
Puddle Length
Usually, this length is 2 to 12 inches longer. Giving a luxurious look and vibe to windows.
Step 2: Choose The Right Curtain Rod Placement

Premium-looking windows have strategically placed curtain rods. Mounting styles and height adjustment help you design a brighter room. These tips are especially useful when installing heavy blackout curtains for better privacy, light control, and insulation. Here are the DIY curtain rod installation tips for beginners.
Mount Above Window Frame
You need to carefully place the curtain rods 4 to 6 inches above the window frame. You can install closer to the ceiling to get a dramatic interior. Through this technique, people gaze vertically at windows. It gives a visually taller look, making windows appear bigger.
Extend Beyond The Window
You need to select a rod and extend it 8 to 10 inches beyond the window. When you open the drapery, the windows look wider and bigger. It gives luxury and a rich look to any ordinary window.
Ceiling Mounted Rods
In this technique, you need to attach curtain rods directly to the ceiling rather than the wall. With this technique, you can achieve a minimalist, sleek aesthetic.
Step 3: Mark And Level Your Brackets

One of the most crucial points is to mark the bracket location. To begin the process, take a tape measure and start marking the point 4 to 6 inches above the frame. Make sure to mark a width of at least 3-6 inches beyond the frame.
Now, hold your bracket up to the location, use a lead pencil, and mark the spot. Take a masking tape and put it over the area. Makes holes in the tape and then drills the points. After that, draw a straight line using a 24-inch spirit level. Measure each side of the bracket and make sure both sides are level.
Step 4: Install Curtain Rod Brackets

Take a stud finder and locate every possible stud. Before installation, check for any cables or pipes. If you have found it, try to avoid it. Using the drill machine, create small holes at the marked location. Take plastic anchors and fit them in the walls. You can use a hammer to fit them accurately. Now, hold the bracket over the wall anchor, then insert the screws. Use a power drill to tighten the screws.
Step 5: Hang The Curtains Rod

Before adding curtain weight, you need to assemble all the hardware. Adjust the rod length and open up the finials before hanging the drapes. Now, place the rods onto the window bracket. Ensure an equal number of rods to extend beyond each curtain side. Tighten the window rods using the smaller screws if provided. Before adding the drapes, perform a tug test. In this process, move up and down the edge to check whether it’s properly fixed. If it’s not working properly, tighten its screws. Check for center support, wether its working properly or not, to avoid snagging.
Step 6: Hang And Adjust Curtains

The final step is to hang the curtains properly to give a uniform look to the windows. If you own eyelet drapes, then slide the rid smoothly. For rod pocket curtains, insert each rod carefully to avoid snagging. Those drapes with rings and hooks can slide across the pole. Adjust the curtain fabric over the pole and spread it across the window. Once you hang the drapery, adjust its pleats to give a formal look. In case of crisp or stubborn fabric, use fabric tape to straighten it. After that, leave it for 48 hours as it is. It’s better to steam the curtains for a pleasant-looking window.
Wrapping Up
Curtain hanging seems tough, but it’s not. With the right techniques, you can get formal and crisp drapery at home. Only the right hardware and tool selection can give the desired results. Also, accurate measurement and proper drilling can avoid fitting mistakes. As a homeowner, you can utilize the above method to hang your curtains like a pro. This will save the cost of hiring a professional and give quick results.